Dynamically Disable Ribbon Buttons in Dynamics CRM
Today I had to dynamically disable a custom Ribbon button. My rule needed to be based on fields on the form and based on the form mode. I only want the button enabled on the Update form and only when a certain checkbox is checked.
Here’s the steps. These will work for CRM 2011 Ribbon buttons or CRM 2012 Command Bar buttons.
To modify the CRM Ribbon / Command Bar I use the excellent Ribbon Workbench tool from Develop 1. To use this tool download their solution file, import it into CRM and then open the Solution. The Ribbon Workbench UI will launch. You will be prompted to open a solution. For best performance it pays to create a temporary solution that contains just the entity you wish to customize and the JavaScript web resources you need to refer to (if applicable).
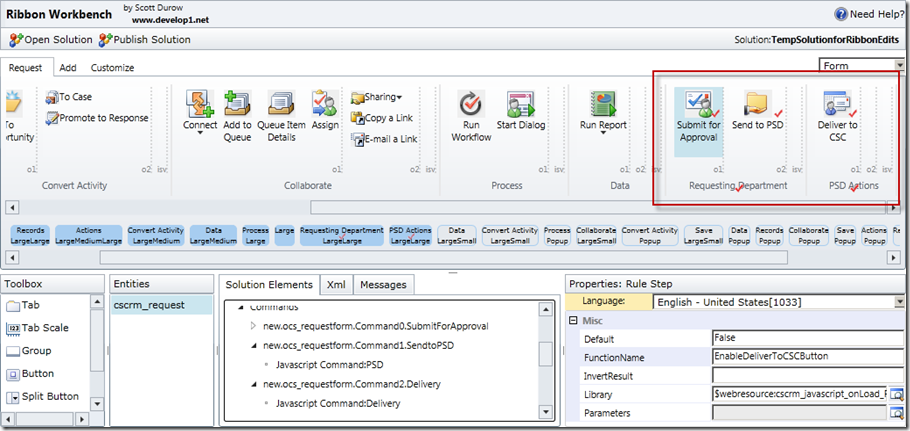
Here’s my custom Ribbon buttons as seen in Ribbon Workbench:
You add custom ribbon buttons by dragging a “Button” from the Toolbox in the bottom left corner of the screen up into the ribbon. Then you set the Button properties through the Property window on the right and define the Button’s Command through the Solution Elements tab in the bottom middle of the screen.
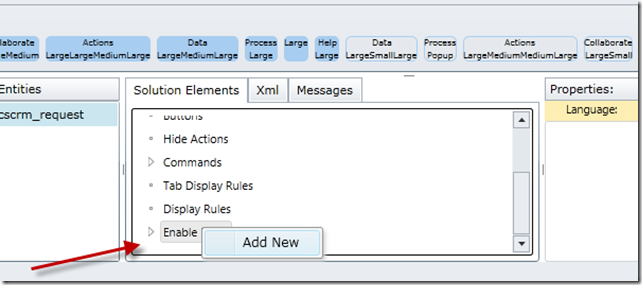
Back to our dynamic rule. First step is to define an Enable Rule. This is done from the Solution Elements tab. Right-click on Enable Rules and select Add New:
Click the arrow to expand Expand Rules, you will see a new Rule listed:
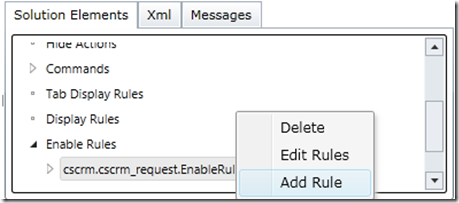
Right-click on the Rule and select Add Rule:
Up will pop a bunch of Rule types for you to pick from. You can chose options here if you want your Button to be enabled only for certain form modes, or in say the Outlook Client but not the Web Client. In my case I want to control the state of my button based on the results of a JavaScript function so I’m going to choose “Custom Javascript Rule”:
Next, click on the CustomRule and then complete the Properties on the right. The important properties here are the Java Script Web Resource library (which will need to be contained in the Solution file you selected when Ribbon Workbench launched) and the FunctionName:
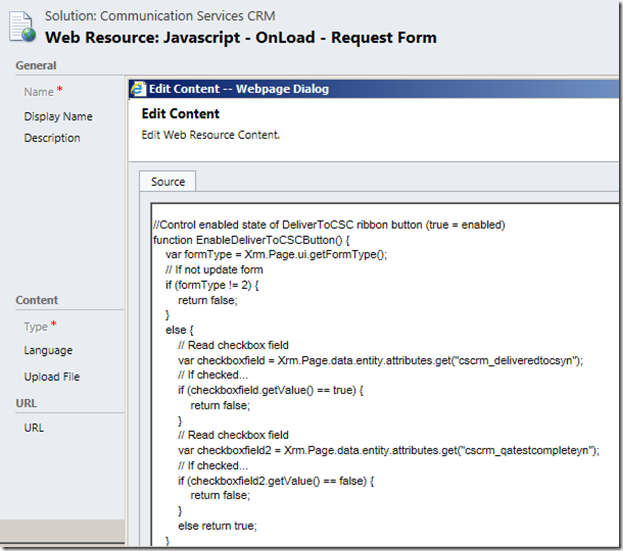
So, obviously, those properties need to match to an actual JavaScript function you have loaded into CRM via a Web Resource. Here’s mine:
The JavaScript function can execute any logic you like, it just needs to return true or false. A value of true will result in the Enabling of the button, false will Disable it.
One last bit, we need to add the Enable Rule to the Command tied to the Button. This is also done from the Solution Elements tab. I already had a Command defined so I just right-click on it and select Edit Enable Rules:
Up pops a Rule selector, simply select your rule and push it over to the right via the Add > button:
If you didn’t have a Command defined for your Button you would need to right-click on Commands in the Solution Elements tab and select Add New and then add the Enable Rule. And you would need to select the Command you created back in the Button’s properties.
Last step is to Publish the changes:
And that’s it. The approach for dynamically changing the display state of a button is almost identical so you are not an expert in that too.
Happy ribboning.
Oh and yes this is all the same in CRM 2013:


